Was glad to see such a positive reaction from sites like Liliputing and Lifehacker to his post from last week when he made the OS available for download. I noticed that it’s still getting a reaction from around the web.
Since last week, Doug Anson’s been tinkering some more. He now has the image running locally on Dell’s Latitude 2100, the Mini 9 and the Mini 10v.
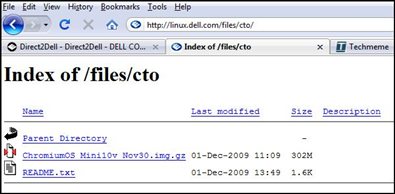
Since some of you last week weren’t able to grab the download, we’ve expanded the data pipe on the server so bandwidth hopefully won’t be a problem. Another thing that will help is that Doug recently posted a compressed version of the image that’s much smaller (302MB vs. the original that was several gigabytes). You can access the compressed customized Chromium image at: http://linux.dell.com/files/cto. The filename is ChromiumOS_Mini10v_Nov30.img.gz, and the instructions for how to uncompress and install are here in this README.txt file. You can also click on the image below to get the files:
I also got a chance to sit down with Doug to chat about his experiences with the Chromium OS. He also ran through a quick demo as well. To see this and more, check out this video.
I know that Doug and team would welcome your thoughts on Chrome. Feel free to leave them in the comments of this blog post.
———————–
Here are the instructions from Doug (punctuation is his) on how to install the Chromium OS to boot locally on a hard drive or SSD:
Below are the instructions to transfer your ChromiumOS onto your Mini 10v HDD from your USB flash key.
You will need a USB-connected CD/DVD player to do this.
!!!!WARNING!!!! THIS WILL *COMPLETELY* ERASE YOUR HARDDRIVE – SO, DON’T PROCEED UNLESS YOUR ARE OK DOING THIS.
These instructions & actions come with ABSOLUTELY NO SUPPORT from DELL of ANY kind and are for SERIOUS TECHNICAL users ONLY – IF UNSURE, DON’T DO IT.
IT WOULD BE WISE TO ENSURE YOU KNOW HOW TO RECOVER YOUR EXISTING OS & DATA BEFORE CONTEMPLATING THIS.
PROCEED AT YOUR OWN RISK.
1). Download and install onto a suitably sized USB flash key an image of ChromiumOS
2). Verify that your USB key is functional by booting your Mini 10v with the USB key – ensure it boots OK and functions as expected.
3). Procure a LiveCD image from http://www.ubuntu.com for Desktop Ubuntu – create a bootable CD/DVD with this image.
4). Reboot your Mini 10v via the LiveCD image created in step 3). Choose the "try Ubuntu before installing it" option at the Ubuntu boot prompt 5). Once the desktop is up, Insert your USB flash key. Unmount any partitions that may be mounted from the USB key 6). Open up a terminal window 7). Type: "sudo fdisk -l" and note which device is your HDD/SSD and which is your USB key. For sake of example, my HDD is "/dev/sda" and my USB key is "/dev/sdc"
8). (!!!THIS STEP WIPES YOUR HDD!!!) Type "sudo dd if=/dev/sdc of=/dev/sda" – BE CAREFUL THAT the "if=/dev/sdc" references your USB KEY and "of=/dev/sda" references your HDD.
9). Once the command in 8) has completed, you can shutdown the Mini 10v, disconnect the USB key and CD/DVD drive.
10). Power on your Mini 10v – your ChromiumOS image should now be on your HDD/SSD.